10/31/2024

Deploying Flink jobs in production using the Flink Kubernetes operator: Part 1


As stream processing is on the rise, it is not uncommon for organizations to write hundreds of Flink jobs to cater to their business needs. Since Flink jobs have great diversity in their configuration, data processing scale, and resourcing needs, a reliable and consistent deployment strategy across all the jobs is ideal. This post is the first of the two articles where we will discuss deploying the Flink Kubernetes Operator itself. The following post can then build up on this one and talk about deploying Flink jobs using Flink Operator.

Diogo Santos has an amazing article introducing Flink Kubernetes Operator and a hands-on guide. 

This is a great first read if you are new to Flink or Flink Kubernetes Operator.


Helm or not to Helm?

The official recommendation is to use helm to deploy Flink Operator on your K8s cluster. 

In most cases, this works fine but there could be cases where you might need to go a manual route.

If you are integrating the deployment with your organization’s CICD framework which does not support helm.If you need to customize your operator deployment, for example, to allow for a Prometheus sidecar. Since this article is targeting a production-level deployment for Flink Operator, it makes sense to add support for a Prometheus sidecar. This is to allow for capturing Flink operator metrics and also to serve as a reference for adding any sidecar as per your need.


Gathering pieces

We need to collect all the artifacts which would allow us to bypass using helm and manually deploy them after customizing them as per our needs. A good starting point would be downloading the Flink Operator artifacts from its official release page.

 
C;\projects> git clone  https://github.com/apache/flink-kubernetes-operator.git


You might be delighted after taking a look at helm/flink-kubernetes-operator and identifying the pieces that form the entirety of Flink Operator deployment. If it is still overwhelming, do not worry, we will see how to use the artifacts.


Customize and Deploy
Let’s customize and deploy the artifacts one by one. The notable ones are:
  • service accounts and roles.
  • flinkdeployments and flinksessionjob CRDs.
  • flink-conf.yaml which contains configurations for the Flink operator.
  • flink-operator.yaml, which is the deployment spec for the Flink operator itself.
  • SAs and Roles for Flink Operator
Flink Operator uses role-based access control to manage the flinkdeployments, and create and manage the JobManager deployment, services, and config map, among others. We will create a role.yaml and sa.yaml.


role.yaml

---
apiVersion: v1
kind: ServiceAccount
metadata:
name: flinkoperator
namespace: flinkoperator
labels:
deploy.artifact.io/name: 'flinkoperator'


sa.yaml
---
apiVersion: rbac.authorization.k8s.io/v1
kind: ClusterRole
metadata:
name: flinkoperator
namespace: flinkoperator
labels:
deploy.artifact.io/name: 'flinkoperator'
rules:
- apiGroups:
- ""
resources:
- pods
- services
- events
- configmaps
- secrets
verbs:
- "*"
- apiGroups:
- apps
resources:
- deployments
- deployments/finalizers
- replicasets
verbs:
- "*"
- apiGroups:
- extensions
resources:
- deployments
- ingresses
verbs:
- "*"
- apiGroups:
- flink.apache.org
resources:
- flinkdeployments
- flinkdeployments/status
- flinksessionjobs
- flinksessionjobs/status
verbs:
- "*"
- apiGroups:
- networking.k8s.io
resources:
- ingresses
verbs:
- "*"
- apiGroups:
- coordination.k8s.io
resources:
- leases
verbs:
- "*"
---
apiVersion: rbac.authorization.k8s.io/v1
kind: ClusterRoleBinding
metadata:
name: flinkoperator
namespace: flinkoperator
labels:
deploy.artifact.io/name: 'flinkoperator'
roleRef:
kind: ClusterRole
name: flinkoperator
apiGroup: rbac.authorization.k8s.io
subjects:
- kind: ServiceAccount
name: flinkoperator
namespace: flinkoperator


kubectl apply --filename sa.yaml -n flinkoperator
kubectl apply --filename role.yaml -n flinkoperator


CRDs
CRDs should not be customized and be deployed as it is.

kubectl replace --filename helm/flink-kubernetes-operator/crds/flinkdeployments.flink.apache.org-v1.yml -n flinkoperator
kubectl replace --filename helm/flink-kubernetes-operator/crds/flinksessionjobs.flink.apache.org-v1.yml -n flinkoperator

Flink config
We will create a config map configmap.yaml and merge the flink config and logging
configs together. Note that log4j-console.properties affects logging related to
job and user code whereas log4j-operator.properties affects Flink Operator logs.


10/30/2024

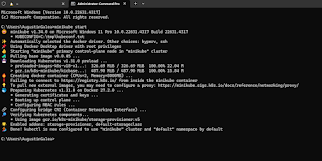
Minikube start

Question: What is minikube?

Answer: minikube is local Kubernetes, focusing on making it easy to learn and develop for Kubernetes.

All you need is Docker (or similarly compatible) container or a Virtual Machine environment, and Kubernetes is a single command away: minikube start


What you’ll need :

  • 2 CPUs or more
  • 2GB of free memory
  • 20GB of free disk space
  • Internet connection
  • Container or virtual machine manager, such as: Docker, QEMU, Hyperkit, Hyper-V, KVM, Parallels, Podman, VirtualBox, or VMware Fusion/Workstation

1.Installation

.Easy path is the installation on Windows by using Windows Package Manager:

winget install Kubernetes.minikube

Other ways to install are described here: minikube 


2. Start your cluster

From a terminal with administrator access (but not logged in as root), run:

minikube start


If minikube fails to start, see the drivers page for help setting up a compatible container or virtual-machine manager.


3.Interact with your cluster

If you already have kubectl installed (see documentation), you can now use it to access your shiny new cluster:


    kubectl get po -A


Alternatively, minikube can download the appropriate version of kubectl and you should be able to use it like this:

        minikube kubectl -- get po -A


You can also make your life easier by adding the following to your shell config: (for more details see: kubectl)


        alias kubectl="minikube kubectl --"


Initially, some services such as the storage-provisioner, may not yet be in a Running state. This is a normal condition during cluster bring-up, and will resolve itself momentarily. For additional insight into your cluster state, minikube bundles the Kubernetes Dashboard, allowing you to get easily acclimated to your new environment:


        minikube dashboard


4. Deploy applications

4.1 Service

Create a sample deployment and expose it on port 8080:

        kubectl create deployment hello-minikube --image=kicbase/echo-server:1.0

        kubectl expose deployment hello-minikube --type=NodePort --port=8080

It may take a moment, but your deployment will soon show up when you run:

        kubectl get services hello-minikube
The easiest way to access this service is to let minikube launch a web browser for you:

        minikube service hello-minikube
Alternatively, use kubectl to forward the port:

        kubectl port-forward service/hello-minikube 7080:8080
Tada! Your application is now available at http://localhost:7080/.

You should be able to see the request metadata in the application output. Try changing the path of the request and observe the changes. Similarly, you can do a POST request and observe the body show up in the output.


4.2 Load Balancer
To access a LoadBalancer deployment, use the “minikube tunnel” command. Here is an example deployment:

        kubectl create deployment balanced --image=kicbase/echo-server:1.0
        
        kubectl expose deployment balanced --type=LoadBalancer --port=8080

In another window, start the tunnel to create a routable IP for the ‘balanced’ deployment:

        minikube tunnel

To find the routable IP, run this command and examine the EXTERNAL-IP column:

        kubectl get services balanced

Your deployment is now available at <EXTERNAL-IP>:8080

4.3 Ingress 
Enable ingress addon:

        minikube addons enable ingress

The following example creates simple echo-server services and an Ingress object to route to these services.

kind: Pod
apiVersion: v1
metadata:
  name: foo-app
  labels:
    app: foo
spec:
  containers:
    - name: foo-app
      image: 'kicbase/echo-server:1.0'
---
kind: Service
apiVersion: v1
metadata:
  name: foo-service
spec:
  selector:
    app: foo
  ports:
    - port: 8080
---
kind: Pod
apiVersion: v1
metadata:
  name: bar-app
  labels:
    app: bar
spec:
  containers:
    - name: bar-app
      image: 'kicbase/echo-server:1.0'
---
kind: Service
apiVersion: v1
metadata:
  name: bar-service
spec:
  selector:
    app: bar
  ports:
    - port: 8080
---
apiVersion: networking.k8s.io/v1
kind: Ingress
metadata:
  name: example-ingress
spec:
  rules:
    - http:
        paths:
          - pathType: Prefix
            path: /foo
            backend:
              service:
                name: foo-service
                port:
                  number: 8080
          - pathType: Prefix
            path: /bar
            backend:
              service:
                name: bar-service
                port:
                  number: 8080
---
Apply the contents

        kubectl apply -f https://storage.googleapis.com/minikube-site-examples/ingress-example.yaml

Wait for ingress address

        kubectl get ingress


NAME              CLASS   HOSTS   ADDRESS          PORTS   AGE
example-ingress   nginx   *       <your_ip_here>   80      5m45s


Note for Docker Desktop Users:
To get ingress to work you’ll need to open a new terminal window and run minikube tunnel and in the following step use 127.0.0.1 in place of <ip_from_above>.

Now verify that the ingress works

        $ curl <ip_from_above>/foo

Request served by foo-app
...

        $ curl <ip_from_above>/bar
Request served by bar-app
...


5. Manage your cluster

Pause Kubernetes without impacting deployed applications:

        minikube pause


Unpause a paused instance:
        minikube unpause

Halt the cluster:
        minikube stop

Change the default memory limit (requires a restart):
        minikube config set memory 9001

Browse the catalog of easily installed Kubernetes services:
        minikube addons list

Create a second cluster running an older Kubernetes release:

        minikube start -p aged --kubernetes-version=v1.16.1

Delete all of the minikube clusters:
        minikube delete --all

Installing Helm & Kubernetes in Docker

Installing Helm & Kubernetes in Docker


Helm is simply a package manager for Kubernetes. It helps you manage Kubernetes applications — Helm Charts helps you define, install, and upgrade even the most complex Kubernetes application.


Implementation:

Follow the below steps to install Helm and Kubernetes in Docker:


Step 1: Installing Docker

- First, download the Docker.exe from the official site.

- Install the docker.exe file on your desktop.

- After installation is complete, restart your desktop.


Step 2: Enabling Kubernetes in Docker Application


Kubernetes, also known as K8s, is an open-source system for automating deployment, 

scaling, and management of containerized applications.  


If you want to install Kubernetes, just follow the simple steps:

- Open Docker Application.

- Click Settings -> Kubernetes  -> Enable Kubernetes


Step 3: Adding Helm package for Kubernetes:


There are two ways by which you can add Helm package:


A. Using Chocolatey Package Manager(Windows):

First, ensure that you are using an administrative shell.

Run Set-ExecutionPolicy Bypass -Scope Process on your command to check the execution policy

Now to download choco on your system, copy the following code and paste it on your command shell-


Set-ExecutionPolicy Bypass -Scope Process -Force;

[System.Net.ServicePointManager]::SecurityProtocol = [System.Net.ServicePointManager]::SecurityProtocol -bor 3072; iex ((New-Object System.Net.WebClient).DownloadString('https://chocolatey.org/install.ps1'))


Now install helm from chocolatey, go to Command Shell or more commonly known as PowerShell and type:


choco install kubernetes-helm


B.Using Script:

The easiest way is to just copy the following code and paste it on your command shell :- 


curl https://raw.githubusercontent.com/helm/helm/master/scripts/get > get_helm.sh

chmod 700 get_helm.sh

./get_helm.sh


10/24/2024

About Grafana Loki Prometheus

 About Grafana Loki Prometheus


- https://grafana.com/docs/loki/latest/setup/install/helm/install-scalable/

- https://grafana.com/docs/loki/latest/query/log_queries/

- https://grafana.com/docs/loki/latest/query/query_examples/

- https://www.atatus.com/blog/a-beginners-guide-for-grafana-loki/

- https://grafana.com/blog/2024/10/07/grafana-for-beginners-quick-tips-to-add-a-data-source-choose-a-visualization-type-and-more/

- https://www.baeldung.com/spring-boot-loki-grafana-logging

- https://grafana.com/blog/2022/04/26/set-up-and-observe-a-spring-boot-application-with-grafana-cloud-prometheus-and-opentelemetry/


Using OpenTelemetry Tracing - Quarkus

Monitoring Quarkus with Prometheus and Grafana - Exceptionly

Logging in Kubernetes with Loki - Piotr's TechBlog

How to Install Grafana Loki using HELM | by davis angwenyi | Medium

⎈ A Hands-On Guide to Kubernetes Logging Using Grafana Loki ⚙️ | by Anvesh Muppeda | Sep, 2024 | Medium

Observability Dev Services with Grafana OTel LGTM - Quarkus


10/22/2024

How to Deploy React App using Azure Static Web Apps

 Microsoft Azure is a public cloud computing platform. It provides a lot of cloud services to access, manage, and deploy applications. Where as Azure Static Web App is one of the services of Microsoft Azure. It automatically builds and deploys full-stack web apps from the code repository to azure.


In this article, we will learn how to deploy React app in Azure Static Web Apps.

Deploying a Web App on Azure App Service: Step-by-Step Guide

 Azure is the Cloud computing platform and Suite of cloud services provided by Microsoft. Azure provides various services including building and deploying web apps, logic apps, configuring databases, etc.

In this article, let us understand how to deploy a web app on Azure app service.


Deploying a Web App on Azure App Service

Step 1: Create and set up your Microsoft Azure account

First, make sure that you have signed in to your Azure portal. If you still figuring out how to sign in to the Azure portal, follow this link: Microsoft-Azure portal. After signing in, you will preview this dashboard.


Step 2: Build your Web Application

Create your web application in the tech stack you want. Microsoft Azure supports various technologies like C#, Java, Python, Ruby, Vue, React, Angular, etc. You can also push your code into GitHub or manage your code with any other Version Control System.

In my case, I created a sample application and pushed it to GitHub.


Step 3: Create a Resource Group, for your Web App

To manage and maintain our web application in terms of access control, resource allocation, etc. We need to have a Resource group. You can use any existing Resource group, if not let us create a new Resource group for our application. Navigate to the `Resource groups` option on the dashboard.


Customize the options as per your requirement and click `Review+create`. you will receive a confirmation message.


Step 4: Create your Web App Service using Azure Services

Now, go back to the home page or dashboard, and you will find the `App Services` option.

I have chosen a `web app` and there are various options to customize. Let me brief the important ones.In the `Basics` tab, we can see some basic options like choosing the Resource group, Name of the Web app, Region, Run-time stack (Run-time stack supports tech stack like Java, node.js, Python, .NET, Go, PHP)


In the `Deployment` tab, we can add and configure our GitHub account settings by enabling the "continuous deployment" option and we can link our GitHub account, repository, and branch.

These are the important and basic configurable options. There are other tabs like "networking", "monitoring", and "tags". The last tab shows ‘Review+create‘ where we can review the properties and create our web app.

Step 5: Deploy your web app

Now, click on the name of your web app in the App Services.

You will find various options listed down along with the "Default domain" option which contains a link. This is the deployed link of your web app. When you click on that link for the first time, you will find a default web page displayed rather than your actual code. We need to modify this.


To modify this default code, go back to your web app, on the left sidebar, under the development tools section, you will find "Advanced tools". Click on that.


You will be navigating to a new tab that shows various options including debbugging console, which has two options: CMD and PowerShell. Lets go with CMD, here the default code directory of the default web page displayed.


Go to the "sites" folder and "wwwroot". you will find "hostingstart.html" there. This contains the code of the default web page displayed.


Go to your application directory on your computer and drag and drop the required files here.


Now, go back to the "Default domain" link or refresh the previously opened link. Now, you will find your web app successfully deployed.


Points to be remembered:

- you can start or stop running your web app anytime, by clicking here, as the Azure web app charges your Azure credits.
- Make sure you give required Access controls to your application through your resource group.
- Now, you can access your web app anywhere with the default domain link.

This is a sample demonstration of Deploying a web app through Azure App Services. There are many configurable options and many approaches to deploy your web app choose according to your requirement and the application’s complexity.


10/20/2024

Using Terraform to deploy infrastructure on Microsoft Azure

Using Terraform to deploy infrastructure on Microsoft Azure


In this article, we will provide a practical end-to-end example of using Terraform to deploy infrastructure on Microsoft Azure. We will also share some best practices, common problems you might encounter when first starting, and how to troubleshoot them. Let’s go!


What we will cover:

  • What is Terraform?
  • What is Microsoft Azure?
  • Why use Terraform on Azure?
  • How to run Terraform with Azure
  • Best practices for using Terraform with Azure
  • Troubleshooting common issues when running Terraform on Azure
  • Example: Kubernetes deployment with Terraform on Azure
  • What is Terraform?


Terraform is an infrastructure-as-code (IaC) tool that allows you to define and provision data center infrastructure using a declarative configuration language. It supports multiple cloud providers, including Microsoft Azure. Using Terraform on Azure, you can create, manage, and update resources like virtual machines, storage accounts, and networking interfaces, ensuring consistent and reproducible infrastructure deployment across different environments. 

Terraform integrates well with automation tools and CI/CD pipelines. As part of your development workflow, you can leverage Terraform scripts to automate infrastructure provisioning and configuration changes.

A typical Terraform workflow involves three main steps: writing the infrastructure as code in configuration files, initializing and planning to preview the changes, and applying those changes to provision the infrastructure.


Basic Terraform commands — quick reference

Here are some common commands you will use in Terraform:

terraform init — Initialize the Terraform working directory. It fetches required plugins and prepares the environment for other commands.

terraform plan — Generate an execution plan outlining the changes Terraform will make based on your configuration files. It shows what will be created, updated, or destroyed.

terraform apply — Apply the planned changes to your infrastructure based on the Terraform configuration. Review the plan carefully before applying.

terraform destroy — Destroy the infrastructure managed by Terraform. Use with caution, as it can permanently remove resources.

terraform show — Show details about a specific resource or the current state of your infrastructure.

terraform state rm <resource name> — Remove a resource from Terraform state management.

terraform state refresh — Refresh the Terraform state to match the actual state of your infrastructure in the cloud provider.

terraform fmt — Reformat your Terraform configuration files to follow the standard coding style.

terraform validate — Validate your Terraform configuration for syntax errors.
terraform get <provider> — Download and install plugins for specific providers (optional argument to specify a provider).


What is Microsoft Azure?

Microsoft Azure is a cloud computing platform developed by Microsoft. It offers a wide range of services, including computing, analytics, storage, and networking, that allow you to build, deploy, and manage applications across a global network of data centers. Users pick and choose from these services to develop and scale new applications or run existing ones.

Common use cases for the Azure public cloud include building and deploying web and mobile applications, developing and deploying cloud-native applications, storing and managing data, and creating and managing virtual machines.

Microsoft Azure features
  • Microsoft Azure offers over 200 products and services.
  • Azure supports all languages and frameworks, allowing you to develop how you want and deploy where you need to.
  • Whether on-premises or across multiple clouds, Azure meets you where you are. It provides services designed for hybrid cloud environments.
  • Azure prioritizes security, compliance, and privacy.

Why use Terraform on Azure?

Terraform allows you to define your infrastructure in code, making it versionable, repeatable, and auditable. You can manage your Azure resources using declarative configuration files. Compared with Azure Resource Manager (ARM) templates, Terraform can be more concise and easier to maintain for complex infrastructure deployments.

Note that Terraform is cloud-agnostic, so you can use the same language to provision resources across Azure, AWS, Google Cloud, and other providers. It also supports hybrid scenarios, seamlessly integrating on-premises and cloud environments. This flexibility is a key reason why many organizations choose to use Terraform as their preferred IaC tool. 

Terraform has a dedicated Azure provider (azurerm) that supports a wide range of Azure resources, allowing you to manage Azure services comprehensively, and it also integrates well with Azure DevOps, enabling you to create CI/CD pipelines for automated deployment and management of your Azure infrastructure.

Terraform ensures consistent resource provisioning. You define the desired state, and Terraform handles the actual deployment, reducing configuration drift. At the same time, Terraform automatically manages resource dependencies. For example, if you create a virtual machine that requires a virtual network, Terraform ensures the network is provisioned first.

Terraform maintains a state file that tracks the actual Azure infrastructure state. This helps with tracking changes, collaboration, and understanding the current environment.

Lastly, Terraform has a vibrant community and a rich ecosystem of providers and modules. You can find pre-built modules for common Azure services, saving time and effort.


How to run Terraform with Azure
To run Terraform with Azure, follow the steps below:

  1. Install the Azure CLI tool.
  2. Install Terraform.
  3. Connect to Azure.
  4. Configure the Terraform Azure provider.
  5. Create and add an Azure resource group.
  6. Verify the results.
  7. Clean up.

1. Install the Azure CLI tool

First, we need to install the Azure CLI tool.

Windows:

Head to the Microsoft download page.

Choose the appropriate installer for your system (32-bit or 64-bit) and download the installer file (.msi).

macOS or Linux:

Open a terminal window and run the following command:
curl -sL https://aka.ms/install-azure-cli | bash

Or using homebrew: 

brew install azure-cli

After installation, confirm it has been successful:

az --version

If the installation was successful, you should see the installed Azure CLI version displayed.

2. Install Terraform

Visit the official Terraform download page.

Select the appropriate version for your operating system (Windows, macOS, or Linux) and architecture (32-bit or 64-bit). Download the installer file (typically a .zip archive for Windows/macOS or a .tar.gz archive for Linux).

Most distributions also offer Terraform packages through package managers. This can be a convenient way to install and update Terraform.


Ubuntu/Debian: sudo apt install terraform

RedHat/CentOS: sudo yum install terraform

macOS (Homebrew): brew tap hashicorp/tap && brew install hashicorp/tap/terraform

chocolatey (Windows): choco install terraform

Verify Terraform is installed:

terraform --version

If the installation was successful, you should see the installed Terraform version displayed.

If you need more help with your Terraform installation, check out How to Download & Install Terraform on Windows, MacOS, Linux.

3. Connect to Azure

After installing the Azure CLI, you need to log in to your Azure account using the az login command. Follow the prompts to authenticate and complete the login process.

az login

If you have multiple Azure subscriptions, you can set your subscription to use for subsequent commands:

az account set --subscription <subscription_id_or_name>


4. Configure the Terraform azurerm provider

The Azure provider is configured in a Terraform configuration file using the azurerm provider configuration block. Create a Terraform configuration file named main.tf (or a name of your choosing) in your project directory.


provider "azurerm" {
  features {}
  # Replace with your Azure subscription ID
  subscription_id = "<your_subscription_id>"
  # Optional: Choose the desired Azure environment from [AzureCloud, AzureChinaCloud, AzureUSGovernment, AzureGermanCloud]
  # environment = "AzureCloud"
  # Optional: Set the Azure tenant ID if using Azure Active Directory (AAD) service principal authentication
  # tenant_id = "<your_tenant_id>"
  # Optional: Set the client ID of your AAD service principal
  # client_id = "<your_client_id>"
  # Optional: Set the client secret of your AAD service principal
  # client_secret = "<your_client_secret>"
}


You can optionally configure authentication using an Azure Active Directory (AAD) service principal by providing tenant_id, client_id, and client_secret. This is a more secure approach compared with using your Azure subscription credentials directly. To avoid hardcoding these in the configuration file, you can set them as environment variables:

export ARM_CLIENT_ID="xxxxx"
export ARM_CLIENT_SECRET="xxxxx"
export ARM_SUBSCRIPTION_ID="xxxxx"
export ARM_TENANT_ID="xxxxx"

5. Create and add an Azure resource group

Add the configuration for the Azure resource group to your configuration file using the azurerm_resource_group block.

resource "azurerm_resource_group" "example_group" {
  name     = "my-resource-group"
  location = "uksouth"
  tags = {
    environment = "dev"
  }
}

In your terminal window, navigate to your Terraform project directory.

Run the command terraform init to initialize Terraform.

Run the command terraform plan to see the changes Terraform will make. This will show you the creation of the resource group. If the plan looks good, run terraform apply to create the resource group in your Azure subscription.

6. Verify the results

Log into the Azure portal and navigate to the Resource Groups section to see your newly created resource group with the specified name and location.

7. Clean up

If you no longer need the resource group, you can remove it using Terraform by running terraform destroy.


Database Persistence and Flyway in Quarkus

Database Persistence and Flyway in Quarkus  Building a Production-Ready Product Management System with PostgreSQL Introduction In ...